-
[두번째-재료구성] 꿍스의 아이를 위한 크리스마스 Android 조이스틱 앱 만들기RC카 만들기 2024. 1. 3. 15:52
HM-10 AT-09 BT-05 BLE 모듈과 통신하는 앱을 만들어 보겠습니다~
원래 wifi모듈로 통신해볼까 했는데 음.. 밖에서도 가지고 놀려면 ble 가 제격인 것 같아서 ble 통신 앱으로 진행 고고
[조이스틱 UI 참고 소스]
조이스틱 UI를 제공해준 안드로이드 라이브러리는 아래의 소스이고 사용에 맞게 조금 수정했습니다.
https://github.com/harry1453/joystick-view
GitHub - harry1453/joystick-view: A simple Andriod Joystick view
A simple Andriod Joystick view. Contribute to harry1453/joystick-view development by creating an account on GitHub.
github.com
그럼 안드로이드 앱을 만들어 봅니다. ㅎㅎ
1. 조이스틱 라이브러리
안드로이드 스튜디오에서 새프로젝트를 만든 후
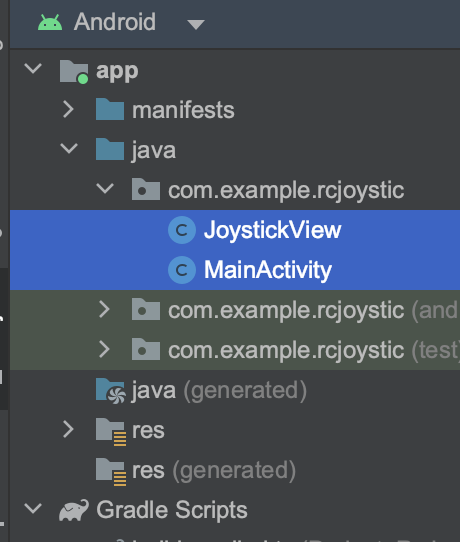
저는 위의 git 프로젝트 모든 파일은 필요없어서 조이스틱UI 에 해당하는 자바 소스를 수정해서 넣어봤습니다.
위소스에서
의 자바소스만 MainActivity.java 가 있는 소스 위치에 넣어줍니다.
아참! 중요한 설정을 해 봅니다.!
블루투스 관련 퍼미션을 넣어줍니다.
이것을 넣어줌으로 앱이 시스템 자원인 블루투스 기능을 사용할 수 있게 해 줍니다.
AndroidManifest.xml 파일의 아래 위치에 user-feature, user-permission 을 넣어줍니다.
<manifest xmlns:android="http://schemas.android.com/apk/res/android"
    xmlns:tools="http://schemas.android.com/tools">

    <uses-feature
        android:name="android.hardware.bluetooth"
        android:required="false" />
    <uses-feature
        android:name="android.hardware.bluetooth_le"
        android:required="false" />

    <uses-permission
        android:name="android.permission.BLUETOOTH"
        android:maxSdkVersion="30" />
    <uses-permission
        android:name="android.permission.BLUETOOTH_ADMIN"
        android:maxSdkVersion="30" />

    <!-- SDK 30 이하를 타겟팅 하는 앱 Bluetooth 권한 -->
    <uses-permission android:name="android.permission.ACCESS_FINE_LOCATION" />
    <uses-permission android:name="android.permission.ACCESS_COARSE_LOCATION" />

    <!-- SDK 31 이상을 타겟팅 하는 앱 Bluetooth 권한 (Android 12+) -->
    <uses-permission android:name="android.permission.BLUETOOTH_SCAN" />
    <uses-permission android:name="android.permission.BLUETOOTH_CONNECT" />
2. layout.xml 파일 수정
프로젝트를 신규 생성하면 res/layout 폴더에 몇개의 xml 파일들이 있는데 이것들 모두 삭제 하고
activity_main.xml 파일만 놔두고 아래와 같이 작성함.
<?xml version="1.0" encoding="utf-8"?>
<LinearLayout xmlns:android="http://schemas.android.com/apk/res/android"
    xmlns:tools="http://schemas.android.com/tools"
    android:layout_width="match_parent"
    android:layout_height="match_parent"
    android:background="#000000"
    android:orientation="vertical"
    android:paddingLeft="@dimen/activity_horizontal_margin"
    android:paddingTop="@dimen/activity_vertical_margin"
    android:paddingRight="@dimen/activity_horizontal_margin"
    android:paddingBottom="@dimen/activity_vertical_margin"
    tools:context="com.example.rcjoystic.MainActivity">
    <LinearLayout
        android:layout_width="match_parent"
        android:layout_height="wrap_content"
        android:layout_weight="1"
        android:orientation="horizontal">

        <!-- 커스텀 조이스틱 뷰 -->
        <com.example.rcjoystic.JoystickView
            android:id="@+id/joystickLeft"
            android:layout_width="wrap_content"
            android:layout_height="321dp"
            android:layout_weight="1" />

    </LinearLayout>
</LinearLayout>
이후 빌드시 res과련 폴더에서 없는 파일들에 관해서 오류가 날 경우 오류나는 파일들은 모두 삭제 하면 됨.
3.MainActivity.java 파일 수정
1. 퍼미션 요청
onCreate()메소드안에 넣어주면 앱 설치 후 실행하면 권한 alert 메세지가 나옵니다. 이 때 모두 수락해 주어야 ble가 작동함
String[] permissions = {
        android.Manifest.permission.BLUETOOTH_SCAN,
        android.Manifest.permission.BLUETOOTH_ADMIN,
        android.Manifest.permission.ACCESS_COARSE_LOCATION,
        android.Manifest.permission.ACCESS_FINE_LOCATION,
        android.Manifest.permission.BLUETOOTH_CONNECT
};

ActivityCompat.requestPermissions(MainActivity.this, permissions, 1023);
2. ble 초기화
멤버변수를 선언해 줍니다.
private BluetoothManager bluetoothManager;
private BluetoothAdapter adapter;
private BluetoothLeScanner scanner;
private BluetoothGatt mBluetoothGatt;
private BluetoothGattCharacteristic bluetoothGattCharacteristic;

static String BLE_DEVICE_NAME = "MLT-BT05";
static String BLE_READ_WRITE_CHARACTERISTIC_UUID = "0000ffe1-0000-1000-8000-00805f9b34fb";
onCreate()변수 내에 ble 관련 변수를 초기화 합니다.bluetoothManager = (BluetoothManager) getSystemService(Context.BLUETOOTH_SERVICE); adapter = bluetoothManager.getAdapter(); scanner = adapter.getBluetoothLeScanner();BLE_READ_WRITE_CHARACTERISTIC_UUID 값은 다음 아두이노 펌웨어 작성에서 다루어 보겠습니다.
2. ble 스캔
앱이 HM-10 모듈을 검색할수 있게 함.
아래의 ScanCallback은 스캔시 스캔 정보를 받아서 처리하는 선언 변수
private final ScanCallback scanCallback = new ScanCallback() {

        @Override
        public void onScanResult(int callbackType, ScanResult result) {
            super.onScanResult(callbackType, result);

            if (ActivityCompat.checkSelfPermission(MainActivity.this, android.Manifest.permission.BLUETOOTH_CONNECT) != PackageManager.PERMISSION_GRANTED) {
                Log.d("permission", "not grandted BLUETOOTH_CONNECT");
                return;
            }

			// HM-10의 모듈 이름 그대로를 사용하여 검색함
            if (result.getDevice().getName() != null && result.getDevice().getName().equals(BLE_DEVICE_NAME)) {

                /// 연결
                result.getDevice().connectGatt(MainActivity.this, false, new BluetoothGattCallback() {
                    @Override
                    public void onPhyUpdate(BluetoothGatt gatt, int txPhy, int rxPhy, int status) {
                        super.onPhyUpdate(gatt, txPhy, rxPhy, status);
                    }

                    @Override
                    public void onPhyRead(BluetoothGatt gatt, int txPhy, int rxPhy, int status) {
                        super.onPhyRead(gatt, txPhy, rxPhy, status);
                    }

                    @Override
                    public void onConnectionStateChange(BluetoothGatt gatt, int status, int newState) {
                        super.onConnectionStateChange(gatt, status, newState);

                        mBluetoothGatt = gatt;

                        if (newState == BluetoothProfile.STATE_CONNECTED) {
                            Log.d("BluetoothGattCallback", "STATE_CONNECTED");
                            if (ActivityCompat.checkSelfPermission(MainActivity.this, android.Manifest.permission.BLUETOOTH_CONNECT) != PackageManager.PERMISSION_GRANTED)
                            {
                                return;
                            }

                            /// 서비스 찾기
                            mBluetoothGatt.discoverServices();
                        }
                    }

                    @Override
                    public void onServicesDiscovered(BluetoothGatt gatt, int status) {
                        super.onServicesDiscovered(gatt, status);
                        Log.d("BluetoothGattCallback", "onServicesDiscovered");

                        if (status == BluetoothGatt.GATT_SUCCESS) {

                            for (BluetoothGattService s : gatt.getServices()) {

                                for (BluetoothGattCharacteristic c : s.getCharacteristics())
                                {
                                    if (ActivityCompat.checkSelfPermission(MainActivity.this, android.Manifest.permission.BLUETOOTH_CONNECT) != PackageManager.PERMISSION_GRANTED) {
                                        return;
                                    }

                                    if (c.getUuid().toString().equals(BLE_READ_WRITE_CHARACTERISTIC_UUID)) {
                                        bluetoothGattCharacteristic = c;
                                    }

                                    /// --- > 연결 완료됨!

                                    mBluetoothGatt.readCharacteristic(c);
                                    mBluetoothGatt.setCharacteristicNotification(c, true);
                                }
                            }

                        }
                    }

                    @Override
                    public void onCharacteristicRead(BluetoothGatt gatt, BluetoothGattCharacteristic characteristic, int status) {
                        super.onCharacteristicRead(gatt, characteristic, status);
                        mBluetoothGatt = gatt;

                        if (status == BluetoothGatt.GATT_SUCCESS) {

                        	/// HM-10모듈로 부터 보내온 데이타를 읽음 - 본 소스에선 앱에서 데이타를 보내면 그대로 전달받기로 함
                            for (int index = 0; index < characteristic.getValue().length; index++) {
                                Log.i("read ble data", characteristic.getUuid().toString() + ":" + String.format("0x%20x", characteristic.getValue()[index]));
                            }
                        }
                    }

                    @Override
                    public void onCharacteristicRead(@NonNull BluetoothGatt gatt, @NonNull BluetoothGattCharacteristic characteristic, @NonNull byte[] value, int status) {
                        super.onCharacteristicRead(gatt, characteristic, value, status);
                        Log.d("BluetoothGattCallback", "onCharacteristicRead");
                    }

                    @Override
                    public void onCharacteristicWrite(BluetoothGatt gatt, BluetoothGattCharacteristic characteristic, int status) {
                        super.onCharacteristicWrite(gatt, characteristic, status);
                        Log.d("BluetoothGattCallback", "onCharacteristicWrite");
                    }

                    @Override
                    public void onCharacteristicChanged(BluetoothGatt gatt, BluetoothGattCharacteristic characteristic) {
                        super.onCharacteristicChanged(gatt, characteristic);
                        Log.d("BluetoothGattCallback", "onCharacteristicChanged");
                    }

                    @Override
                    public void onCharacteristicChanged(@NonNull BluetoothGatt gatt, @NonNull BluetoothGattCharacteristic characteristic, @NonNull byte[] value) {
                        super.onCharacteristicChanged(gatt, characteristic, value);
                        Log.d("BluetoothGattCallback", "onCharacteristicChanged");
                    }

                    @Override
                    public void onDescriptorRead(BluetoothGatt gatt, BluetoothGattDescriptor descriptor, int status) {
                        super.onDescriptorRead(gatt, descriptor, status);
                        Log.d("BluetoothGattCallback", "onDescriptorRead");
                    }

                    @Override
                    public void onDescriptorRead(@NonNull BluetoothGatt gatt, @NonNull BluetoothGattDescriptor descriptor, int status, @NonNull byte[] value) {
                        super.onDescriptorRead(gatt, descriptor, status, value);
                        Log.d("BluetoothGattCallback", "onDescriptorRead");
                    }

                    @Override
                    public void onDescriptorWrite(BluetoothGatt gatt, BluetoothGattDescriptor descriptor, int status) {
                        super.onDescriptorWrite(gatt, descriptor, status);
                        Log.d("BluetoothGattCallback", "onDescriptorWrite");
                    }

                    @Override
                    public void onReliableWriteCompleted(BluetoothGatt gatt, int status) {
                        super.onReliableWriteCompleted(gatt, status);
                        Log.d("BluetoothGattCallback", "onReliableWriteCompleted");
                    }

                    @Override
                    public void onReadRemoteRssi(BluetoothGatt gatt, int rssi, int status) {
                        super.onReadRemoteRssi(gatt, rssi, status);
                        Log.d("BluetoothGattCallback", "onReadRemoteRssi");
                    }

                    @Override
                    public void onMtuChanged(BluetoothGatt gatt, int mtu, int status) {
                        super.onMtuChanged(gatt, mtu, status);
                        Log.d("BluetoothGattCallback", "onMtuChanged");
                    }

                    @Override
                    public void onServiceChanged(@NonNull BluetoothGatt gatt) {
                        super.onServiceChanged(gatt);
                        Log.d("BluetoothGattCallback", "onServiceChanged");

                    }
                });

            }
        }
    };
위의 ScanCallback으로 스캔 실행
if (ActivityCompat.checkSelfPermission(this, android.Manifest.permission.BLUETOOTH_SCAN) == PackageManager.PERMISSION_GRANTED) {
    scanner.startScan(scanCallback);
} else {
    Log.d("permission-start-scan", "Not permited");
}
mBluetoothGatt;
bluetoothGattCharacteristic;위의 변수는 메인 쓰레드에서 실행되기 위하여 선언된 변수들이고 ScanCallback 에서 전달받는 인자들로 대입함.
그리고 최종 rx(수신 서비스), tx(전송 서비스) uuid 까지 찾은 코드는 onServiceDiscovery 콜백에서 볼수 있음.
2. HM-10모듈에게 데이타 전달
try{
    bluetoothGattCharacteristic.setValue(bytes);
    if (ActivityCompat.checkSelfPermission(MainActivity.this, android.Manifest.permission.BLUETOOTH_CONNECT) != PackageManager.PERMISSION_GRANTED)
    {
        return;
    }
    mBluetoothGatt.writeCharacteristic(bluetoothGattCharacteristic);

}catch (Exception e){

}
이상 관련코드를 살펴보았다
- ble모듈 스캔
- 연결
- 서비스 찾기
- 데이타 전송
이렇게 정리할수 있음.
다음은 펌웨어 쪽 코드를 살펴봅니다.!
'RC카 만들기' 카테고리의 다른 글
[첫번째-재료구성] 꿍스의 아이를 위한 크리스마스 선물 RC카 + Android 조이스틱 앱 만들기 (0) 2023.12.27